Deploying ShareGate in the Cloud
Automating Azure VM Setup with Terraform

Introduction
In today's fast-paced digital landscape, efficient and seamless data migration is critical for businesses striving to stay ahead. ShareGate, a leading migration tool, is essential for organizations transitioning to the cloud. However, setting up and configuring ShareGate on an Azure Virtual Machine (VM) can be complex and time-consuming. In this blog post, we will walk you through automating the deployment of an Azure VM and the installation of ShareGate using Terraform. By leveraging Infrastructure as Code (IaC), we aim to simplify the process, enhance efficiency, and ensure a consistent and repeatable setup for your migration needs.
We'll break down each Terraform file involved, providing explanations, customizations, and conclusions for each component. By the end of this guide, you will have a comprehensive understanding of how to use Terraform to set up your Azure environment and automate the installation of ShareGate.
Prerequisites
Before proceeding, ensure you have the following:
- ShareGate software downloaded and stored in the same folder as your Terraform files. Download ShareGate Software
- Azure subscription with appropriate permissions.
- Azure CLI installed to authenticate. Download Azure CLI
- Terraform installed locally. Download Terraform
- For the terraform *.tf files I created local folder called sgwindows. Download files
Note
In the next sections we will dive into the creation of the terraform configuration files, provide a brief explanation, context on how to customize it for your own use, a high-level conclusion and finally the terraform configuration code to deploy the solution.
Provider Configuration: provider.tf
Explanation
The provider.tf file defines the Azure provider that Terraform will use to manage your Azure resources. The provider block specifies the required provider and any necessary configurations.
Customization
If you are using a different version of the Azure provider or need additional configurations, you can modify the provider block accordingly.
Conclusion
This file is essential as it sets up the connection between Terraform and Azure, enabling the deployment and management of resources in your Azure environment.
Code
#####################################################################
# provider.tf
#####################################################################
# Azure Provider
provider "azurerm" {
features {}
}
Specifying Versions: version.tf
Explanation
The version.tf file specifies the required Terraform version and provider versions. This ensures compatibility and prevents issues arising from version discrepancies.
Customization
Adjust the versions according to your requirements or based on the latest compatibility guidelines.
Conclusion
Defining versions ensures a stable and predictable environment for your Terraform configurations.
Code
#####################################################################
# version.tf
#####################################################################
# Provider Version
terraform {
required_version = ">=1.0"
required_providers {
azurerm = {
source = "hashicorp/azurerm"
version = "~>3.0"
}
random = {
source = "hashicorp/random"
version = "~>3.0"
}
}
}
Generating Unique Identifiers: random.tf
Explanation
The random.tf file uses the random_id resource to generate unique identifiers, ensuring resource names are unique.
Customization
You can modify the byte_length or add other keepers to customize how the IDs are generated.
Conclusion
Using random_id helps avoid name collisions and ensures each resource has a unique identifier.
Code
#####################################################################
# random.tf
#####################################################################
# Generate random text for a unique storage account name
resource "random_id" "random_id" {
keepers = {
# Generate a new ID only when a new resource group is defined
resource_group = azurerm_resource_group.rg.name
}
byte_length = 6
}
Local Variables: local.tf
Explanation
The local.tf file defines reusable values like common tags and network security group (NSG) rules using local variables.
Customization
You can adjust the tags and NSG rules to match your organization's tagging standards and security requirements.
Conclusion
Local variables enhance maintainability and readability by centralizing commonly used values.
Code
#####################################################################
#local.tf
#####################################################################
# Create common tags and NSG Rules using locals resource
locals {
common_tags = {
Environment = var.environment
Owner = var.owner
ProjectCode = var.projectcode
CostCenter = var.costcenter
}
nsgrules = {
AllowRDP = {
name = "AllowRDP"
priority = 110
direction = "Inbound"
access = "Allow"
protocol = "Tcp"
source_port_range = "*"
destination_port_range = "3389"
source_address_prefix = "*"
destination_address_prefix = "*"
}
AllowHTTP = {
name = "AllowHTTP"
priority = 120
direction = "Inbound"
access = "Allow"
protocol = "Tcp"
source_port_range = "*"
destination_port_range = "80"
source_address_prefix = "*"
destination_address_prefix = "*"
}
AllowHTTPS = {
name = "AllowHTTPS"
priority = 130
direction = "Inbound"
access = "Allow"
protocol = "Tcp"
source_port_range = "*"
destination_port_range = "443"
source_address_prefix = "*"
destination_address_prefix = "*"
}
}
}
Defining Variables: variables.tf
Explanation
The variables.tf file declares input variables used throughout the Terraform configuration, making the setup flexible and reusable.
Customization
Modify the default values and descriptions as per your project requirements.
Conclusion
Variables provide flexibility and allow the same Terraform configuration to be used in different environments with different inputs.
Code
#####################################################################
# variables.tf
#####################################################################
variable "prefix" {
type = string
default = "app"
description = "Prefix of the resource name"
}
variable "location" {
description = "Azure Location"
type = string
}
variable "environment" {
description = "Environment Type - Prod/Stage/Dev"
type = string
}
variable "owner" {
description = "Environment Owner"
type = string
}
variable "projectcode" {
description = "Project Code"
type = string
}
variable "costcenter" {
description = "Cost Center"
type = string
}
variable "vnet_address_space" {
description = "Virtual Network Address Space"
type = list(string)
}
variable "subnet_names" {
description = "Names of the subnets"
type = list(string)
default = []
validation {
condition = length(var.subnet_names) <= 5
error_message = "The number of subnets must be less than 5."
}
}
variable "allocation_method" {
description = "Public IP Allocation Method"
type = string
}
variable "admin_username" {
description = "Windows VM Admin User Name"
type = string
default = "adminuser"
}
variable "admin_password" {
description = "Windows VM Admin Password"
sensitive = true
type = string
}
variable "vm_size" {
description = "Virtual Machine Size"
type = string
default = "Standard_D2S_v3"
}
variable "os_disk_caching" {
description = " VM OS Disk Caching"
type = string
default = "ReadWrite"
}
variable "os_disk_storage_account_type" {
description = "OS Disk Storae Account Type"
type = string
}
variable "src_img_ref_publisher" {
description = "Source Image Reference Pubisher"
type = string
}
variable "src_img_ref_offer" {
description = "Source Image Reference Offer"
type = string
}
variable "src_img_ref_sku" {
description = "Source Image Reference Sku"
type = string
}
variable "src_img_ref_version" {
description = "Source Image Reference Version"
type = string
}
variable "stg_account_tier" {
description = "Storage Account Tier"
}
variable "stg_account_replication_type" {
description = "Storage Account Replication Type"
type = string
}
variable "storage_container_name" {
description = "Storage2 Account Container Name"
type = string
}
variable "container_access_type" {
description = "Container Access Type"
type = string
}
variable "blob_sharegate_msi" {
description = "Blob ShareGate MSI"
type = string
}
variable "blob_type" {
description = "Blob Type"
type = string
}
Setting Variable Values: terraform.tfvars
Explanation
The terraform.tfvars file provides the values for the input variables defined in variables.tf. This file is used to customize the deployment for a specific environment.
Customization
Modify the values in this file to match your environment's requirements, such as location, VM size, and credentials.
Conclusion
The terraform.tfvars file is crucial for defining environment-specific values, allowing the same configuration to be reused across different setups.
Code
#####################################################################
# terraform.tfvars
#####################################################################
# General
prefix = "sgate"
location = "East Us"
# Common Tags
environment = "Dev"
owner = "Roger Taylor"
projectcode = "0123"
costcenter = "C8956"
# Virtual Network
vnet_address_space = ["10.0.0.0/16"]
subnet_names = ["sg-subnet1"]
# Public IP
allocation_method = "Static"
# VM Credentials
admin_username = "adminuser"
admin_password = "Azure@123"
# VM Configuration
vm_size = "Standard_D2S_v3"
os_disk_caching = "ReadWrite"
os_disk_storage_account_type = "Standard_LRS"
src_img_ref_publisher = "MicrosoftWindowsServer"
src_img_ref_offer = "WindowsServer"
src_img_ref_sku = "2022-Datacenter"
src_img_ref_version = "latest"
# VM diagnostic Storage Account
stg_account_tier = "Standard"
stg_account_replication_type = "LRS"
storage_container_name = "software"
container_access_type = "container"
blob_sharegate_msi = "ShareGate.24.6.0.msi"
blob_type = "Block"
Main Configuration: main.tf
Explanation
The main.tf file is the core of the Terraform configuration, defining the main resources like the Azure resource group.
Customization
You can add or remove resources based on your infrastructure needs. Ensure that the tags and resource names align with your naming conventions.
Conclusion
The main.tf file is the backbone of your Terraform setup, defining the primary resources and their configurations.
Code
#####################################################################
# main.tf
#####################################################################
# Create Azure Resource Group
resource "azurerm_resource_group" "rg" {
name = "${var.prefix}-rg"
location = var.location
# Common Tags
tags = local.common_tags
}
Networking: network.tf
Explanation
The network.tf file defines the virtual network (VNet) and its configurations.
Customization
Adjust the address space and tags to match your network design and tagging strategy.
Conclusion
Properly configuring the VNet is crucial for network segmentation and security.
Code
#####################################################################
# network.tf
#####################################################################
# Create Virtual Network
resource "azurerm_virtual_network" "vnet" {
name = "${var.prefix}-vnet"
location = var.location
resource_group_name = azurerm_resource_group.rg.name
address_space = var.vnet_address_space
# Common Tags
tags = local.common_tags
depends_on = [azurerm_resource_group.rg]
}
Subnet Configuration: subnets.tf
Explanation
The subnets.tf file defines the subnets within the VNet.
Customization
Modify the subnet names and address prefixes as per your network architecture.
Conclusion
Subnets help in logically dividing the VNet into smaller, manageable segments.
Code
#####################################################################
# subnets.tf
#####################################################################
# Create Subnet
resource "azurerm_subnet" "subnets" {
count = length(var.subnet_names)
name = var.subnet_names[count.index]
resource_group_name = azurerm_resource_group.rg.name
virtual_network_name = azurerm_virtual_network.vnet.name
address_prefixes = ["10.0.${count.index + 1}.0/24"]
depends_on = [
azurerm_resource_group.rg,
azurerm_virtual_network.vnet
]
}
Network Security: nsg.tf and nsg-rules.tf
Explanation
The nsg.tf file defines the network security group (NSG), and the nsg-rules.tf file defines the security rules.
Customization
Adjust the rules and priorities based on your security requirements.
Conclusion
NSGs and their rules are vital for controlling inbound and outbound traffic to your Azure resources.
Code
#####################################################################
# nsg.tf
#####################################################################
# Create Network Security Group
resource "azurerm_network_security_group" "nsg" {
name = "${var.prefix}-nsg"
location = var.location
resource_group_name = azurerm_resource_group.rg.name
# Common Tags
tags = local.common_tags
depends_on = [azurerm_resource_group.rg]
}
# Associate Network Security Group to Subnet
resource "azurerm_subnet_network_security_group_association" "nsg-link" {
subnet_id = azurerm_subnet.subnets[0].id
network_security_group_id = azurerm_network_security_group.nsg.id
depends_on = [
azurerm_virtual_network.vnet,
azurerm_network_security_group.nsg
]
}
#####################################################################
# nsg-rules.tf
#####################################################################
# Create Network Security Group Rules using for_each
resource "azurerm_network_security_rule" "nsgrules" {
for_each = local.nsgrules
name = each.key
direction = each.value.direction
access = each.value.access
priority = each.value.priority
protocol = each.value.protocol
source_port_range = each.value.source_port_range
destination_port_range = each.value.destination_port_range
source_address_prefix = each.value.source_address_prefix
destination_address_prefix = each.value.destination_address_prefix
resource_group_name = azurerm_resource_group.rg.name
network_security_group_name = azurerm_network_security_group.nsg.name
}
Storage Configuration: storage.tf
Explanation
The storage.tf file defines storage accounts for diagnostics and ShareGate software.
Customization
Adjust the storage account names, types, and configurations based on your storage needs.
Conclusion
Configuring storage accounts is essential for diagnostics and storing necessary software like ShareGate.
Code
#####################################################################
# storage.tf
#####################################################################
# Create storage account for boot diagnostics
resource "azurerm_storage_account" "stgacct" {
name = "diag${random_id.random_id.hex}"
location = var.location
resource_group_name = azurerm_resource_group.rg.name
account_tier = var.stg_account_tier
account_replication_type = var.stg_account_replication_type
}
# Create storage for ShareGate Software
resource "azurerm_storage_account" "stgacct2" {
name = "soft${random_id.random_id.hex}"
resource_group_name = azurerm_resource_group.rg.name
location = var.location
account_tier = var.stg_account_tier
account_replication_type = var.stg_account_replication_type
}
resource "azurerm_storage_container" "container" {
name = var.storage_container_name
storage_account_name = azurerm_storage_account.stgacct2.name
container_access_type = var.container_access_type
}
resource "azurerm_storage_blob" "sharegate_msi" {
name = var.blob_sharegate_msi
storage_account_name = azurerm_storage_account.stgacct2.name
storage_container_name = azurerm_storage_container.container.name
type = var.blob_type
source = var.blob_sharegate_msi
}
Networking Interface: nic.tf
Explanation
The nic.tf file defines the network interface for the VM.
Customization
Ensure the network interface configurations match your network setup.
Conclusion
The network interface connects the VM to the VNet, enabling communication with other resource.
Code
#####################################################################
# nic.tf
#####################################################################
# Create Network Interface
resource "azurerm_network_interface" "nic" {
name = "${var.prefix}-nic"
location = var.location
resource_group_name = azurerm_resource_group.rg.name
# Common Tags
tags = local.common_tags
ip_configuration {
name = "internal"
subnet_id = azurerm_subnet.subnets[0].id
private_ip_address_allocation = "Dynamic"
public_ip_address_id = azurerm_public_ip.publicip.id
}
depends_on = [
azurerm_subnet.subnets
]
}
Public IP Configuration: publicip.tf
Explanation
The publicip.tf file defines the public IP address for the VM.
Customization
Adjust the allocation method and other properties based on your requirements.
Conclusion
A public IP address is necessary for accessing the VM from the internet.
Code
#####################################################################
# publicip.tf
#####################################################################
resource "azurerm_public_ip" "publicip" {
name = "${var.prefix}-pubip"
resource_group_name = azurerm_resource_group.rg.name
location = var.location
allocation_method = var.allocation_method
sku = "Standard"
# Common Tags
tags = local.common_tags
depends_on = [azurerm_resource_group.rg]
}
Windows Virtual Machine: windowsvm.tf
Explanation
The windowsvm.tf file defines the Windows virtual machine configuration.
Customization
Adjust the VM size, OS disk configurations, and image reference based on your needs.
Conclusion
Properly configuring the VM is essential for ensuring it meets your performance and functional requirements.
Code
#####################################################################
# windowsvm.tf
#####################################################################
# Create Windows Virtual Machine
resource "azurerm_windows_virtual_machine" "vm" {
name = "${var.prefix}-vm"
computer_name = "${var.prefix}-vm"
resource_group_name = azurerm_resource_group.rg.name
location = var.location
size = var.vm_size
admin_username = var.admin_username
admin_password = var.admin_password
# Common Tags
tags = local.common_tags
network_interface_ids = [
azurerm_network_interface.nic.id,
]
os_disk {
caching = var.os_disk_caching
storage_account_type = var.os_disk_storage_account_type
name = "${var.prefix}-OsDisk"
}
source_image_reference {
publisher = var.src_img_ref_publisher
offer = var.src_img_ref_offer
sku = var.src_img_ref_sku
version = var.src_img_ref_version
}
depends_on = [
azurerm_network_interface.nic,
azurerm_resource_group.rg,
azurerm_storage_account.stgacct
]
boot_diagnostics {
storage_account_uri = azurerm_storage_account.stgacct.primary_blob_endpoint
}
}
Custom Script Extension: custom-ext.tf
Explanation
The custom-ext.tf file defines the custom script extension for the VM to install ShareGate.
Customization
Adjust the script URL and command as necessary for your specific installation requirements.
Conclusion
The custom script extension automates the installation of ShareGate, saving time and ensuring consistency.
Code
#####################################################################
# custom-ext.tf
#####################################################################
# Create Custom Extenstion
resource "azurerm_virtual_machine_extension" "vmextension" {
name = "vmextension"
virtual_machine_id = azurerm_windows_virtual_machine.vm.id
publisher = "Microsoft.Compute"
type = "CustomScriptExtension"
type_handler_version = "1.10"
settings = <<SETTINGS
{
"fileUris": ["https://${azurerm_storage_account.stgacct2.name}.blob.core.windows.net/software/ShareGate.24.6.0.msi"],
"commandToExecute": "msiexec /i ShareGate.24.6.0.msi /q SHAREGATEINSTALLSCOPE=PERMACHINE RESTARTEDASADMIN=1 ALLUSERS=1"
}
SETTINGS
}
Backend Configuration: backend.tf
Explanation
The backend.tf file configures the remote backend for storing the Terraform state file.
Customization
Ensure the resource group name, storage account name, container name, and key match your backend storage setup.
Conclusion
Using a remote backend ensures your Terraform state is stored securely and can be accessed by team members.
Code
#####################################################################
# backend.tf
#####################################################################
# Create Backend in Azure
terraform {
backend "azurerm" {
resource_group_name = "remotestate-rg"
storage_account_name = "azremotebackend"
container_name = "tfstate"
key = "path/terraform.tfstate"
}
}
Initializing and Deploying with Terraform
After configuring all your Terraform files, you need to initialize and deploy your infrastructure using the following Terraform commands.
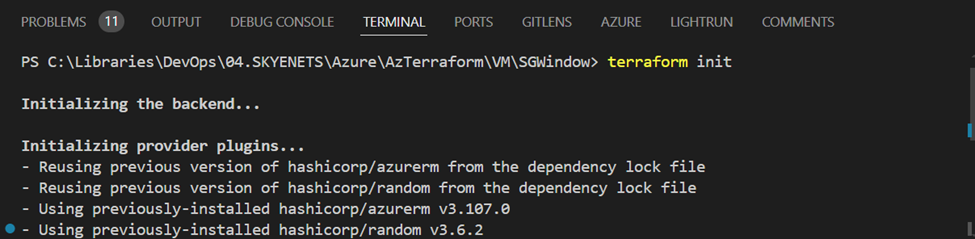
“terraform init”
This command initializes the Terraform configuration, setting up the backend and downloading necessary provider plugins.
Open a PowerShell command window and change the directory to sgwindows folder were the terraform *.tf files are stored
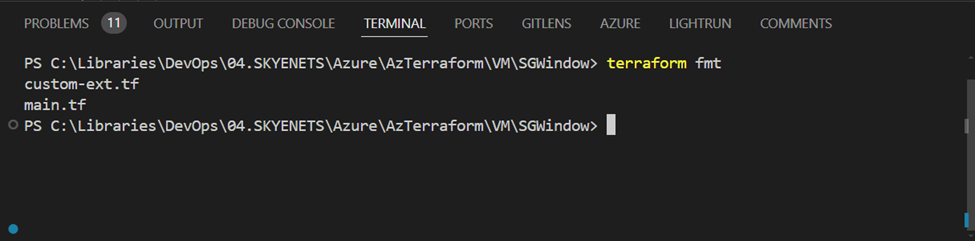
“terraform fmt”
This command formats your Terraform configuration files to ensure they follow standard coding conventions.
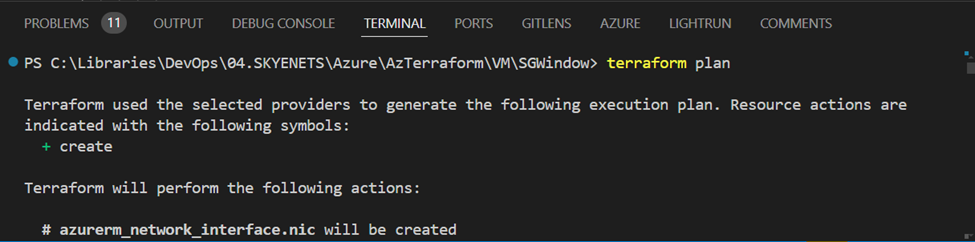
“terraform plan”
This command creates an execution plan, showing what actions Terraform will take to achieve the desired state.
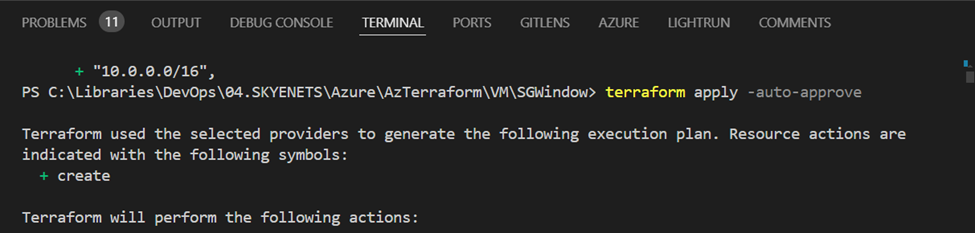
“terraform apply -auto-approve”
This command applies the execution plan, deploying the resources defined in your Terraform configuration files.
Validating Deployment
Azure Portal
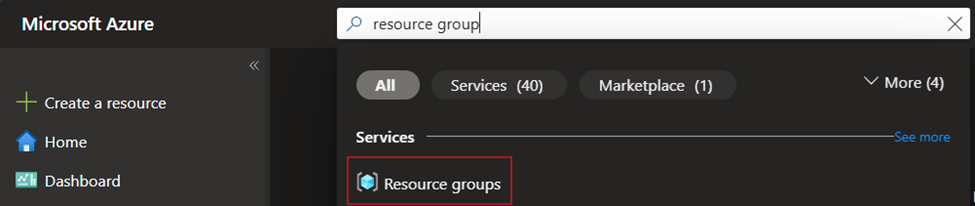
- Logon into Azure Portal
- In the top search box, type "resource group" and select Resource Groups.
3. Select the sgate-rg resource group.
4. Select the sgate-vnet virtual network resource.
5. In the left panel menu, scroll down to the Monitoring section and select Diagram.
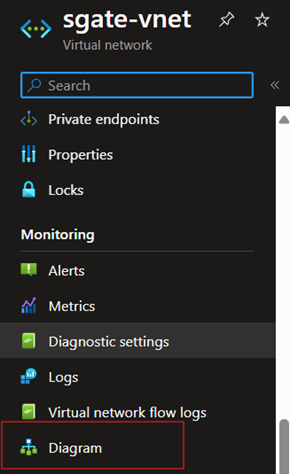
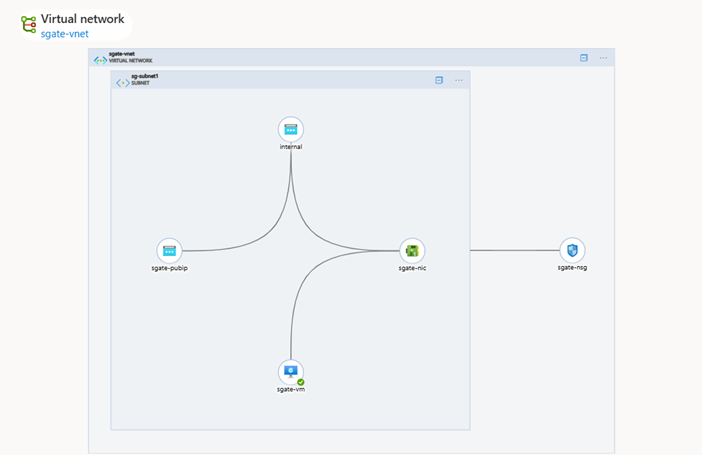
6. The right panel will display a diagram of the solution deployed to Azure.
VM
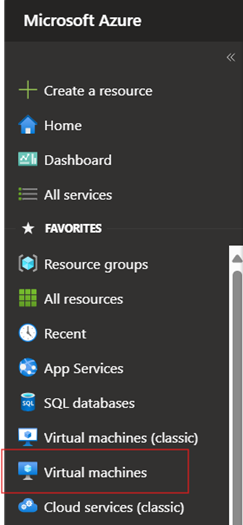
1. Next go to the virtual machines
2. Select the sgate-vm
3. In the Overview section, select Connect to establish an RDP session with the VM.
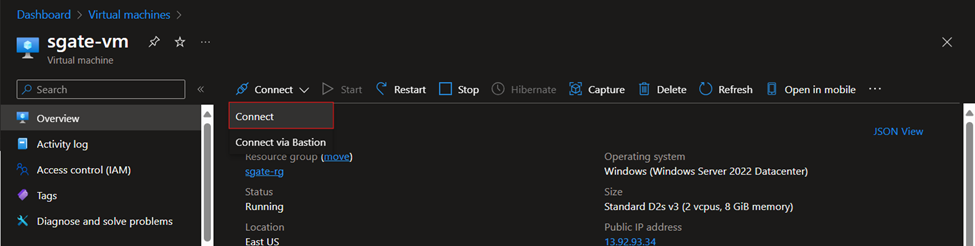
4. Log on to the VM and validate that ShareGate is on the desktop.
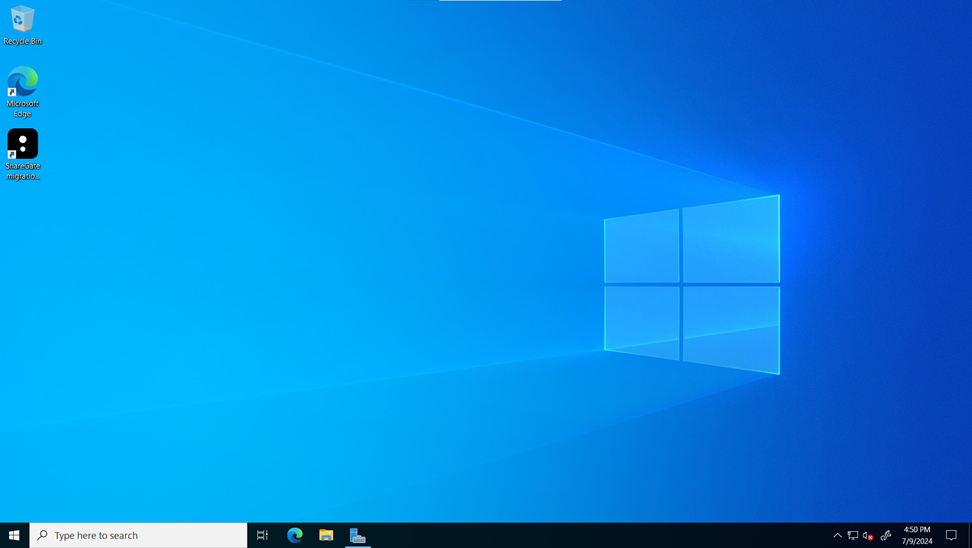
And there it is the ShareGate software is installed and ready to be activated with a valid license number.
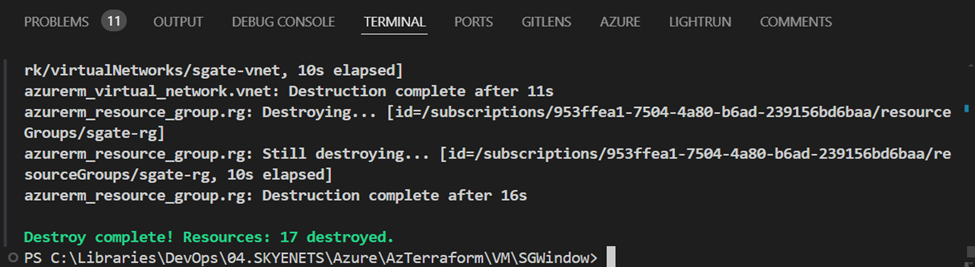
Cleaning Up with terraform destroy
When you no longer need the infrastructure, you can clean up by destroying the deployed resources using the following command.
terraform destroy -auto-approve
Conclusion
By following these steps and understanding each Terraform file, you can efficiently deploy an Azure VM and automate the installation of ShareGate. This approach not only saves time but also ensures a consistent and repeatable setup, crucial for successful data migrations. Using Terraform's commands to initialize, format, plan, apply, and eventually destroy your infrastructure ensures you maintain control over your environment throughout its lifecycle.
Thanks for coming along with me on this terraform journey.